Machine Maintenance
|
It is necessary to maintain your machine on a regular basis in order to sustain its maximum effectiveness. The important steps for machine maintenance include:
|
Enagic® Kangen Water® Machine Maintenance.
It is very easy and inexpensive to maintain Enagic® Kangen Water® ionizers. When you get into a routine and do it, you’ll be getting the most out of your machine. It will last you a very long time. And you’ll be saving money. Hardly anything goes wrong with Kangen units. Most of problems are caused by insufficient or incorrect maintenance.
Here’s how to maintain your Kangen Water® machine.
|
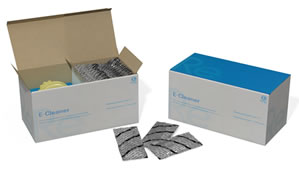
The correct process for using the E-Cleaner is to:
|
Important:
ALWAYS allow the machine to clean itself after making strong acidic water to prevent this highly acidic substance from soaking on the plates. If this happens repeatedly without proper maintenance, the plates can eventually become damaged. After making strong acidic water, change back to drinking water and run water through the machine until it goes back into Kangen mode.
Like anything else, care is essential to ensuring the best performance and longevity of your machine. Protect your investment by taking the simple steps in properly maintaining all of your Kangen Water® ionization systems. |
|
Even when you do e-cleanings regularly, you will still need to have a deep cleaning done at least twice a year. This will ensure maximum effectiveness and yield the best results for your Kangen Water®.
|
Maintaining Your Kangen Water Machine
|
Your ABC’s for regular and proper maintenance to keep your machine at full performance: A: Run the Beauty Water DAILY for one to two minutes (depending on how hard YOUR water is). B: Perform an E-Cleaning 1-2 times per month (depending on how hard YOUR water is). C: Have a deep cleaning performed by Enagic Corporate as needed. |
SD-501 with the E-Cleaner: Abbreviated directions
Note: The E-Cleaner powder is just food grade citric acid. It is harmless but avoid getting it in the eyes.
1) Power off the unit.
2) Unplug the unit..
3) Unscrew the cap to the plastic cleaning cartridge.
4) Open one packet of cleaning granules and carefully pour it into the cartridge.
5) Replace cap until it is firmly closed.
6) Remove the cover to the filter.
7) Unlock the locking ring and remove the water filter, locking ring and BOTH the little black O-rings.
8) Seperate the locking ring from the filter. Set the filter aside, upside down (to avoid leakage)
9) Insert the cleaning cartridge where the filter was located.
10) Place the locking ring over the cleaning cartridge and securely lock in place.
11) Gently turn on the tap and allow water to fill the cleaning cartridge and dissolve the citric acid powder.
12) Allow the water to flow from the flexible white hose–for about 15 seconds.
13) Shut off the water.
14) Place the end of the flexible white hose and the gray hose in a bowl to capture run-off. The bowl should be at the same level as the unit to avoid a siphoning effect.
The citric acid is now surrounding the electroplates & dissolving mineral scale.
15) Allow the uniit to sit like this for at least 3-5 hours (or just leave overnight)
Do not operate your unit while in the cleaning mode!
16) Keep unit OFF and unplugged during this last process!
17) After the time limit as passed, remove the flex pipe and gray hose from the bowl.
18) Turn water ON for 2-3 minutes to flush out all the citric acid cleaning solution.
19) Turn water OFF, unlock the locking riing and remove the cleaning cartridge.
20) Unscrew the cap to the cleaning cartridge, shake out excess water and allow to air dry on towel.
21) Return the water FILTER and locking ring to their original positions in your unit and secure into place.
22) Press Power ON button, then turn the water back ON and let it run for 2-3 minutes to re-initialize the filter. (If this is the first time putting in a NEW filter then push the re-set button.)
23) Check for leaks and proper placement of the filter and locking ring.
24) Replace the filter cover. Mark your calendar so you can remember to do it again in 2 weeks.
25) Now enjoy your Kangen Water!
